Appearance
Appearance is the agent's face and voice: the avatar that represents it, the profile picture your customers see, and the voice it speaks with in audio messages and calls.
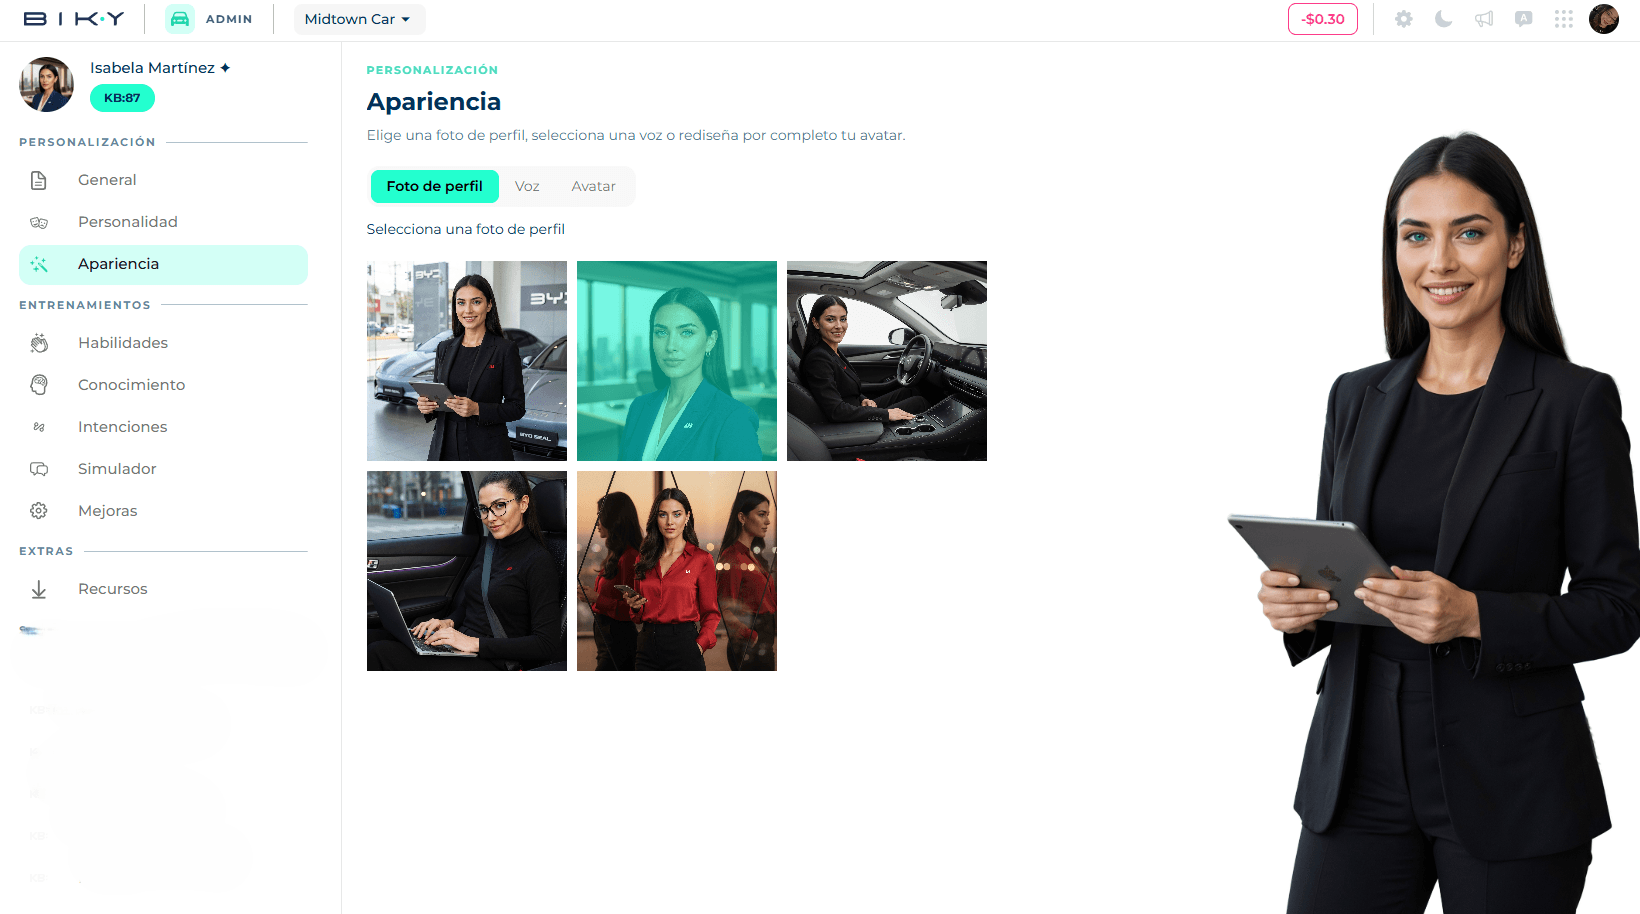
You edit it under Biky admin → Appearance. At the top there is a switch with three tabs, in this order: Profile picture, Voice and Avatar. The current avatar is always shown on the right.
Avatar
The avatar is the full character: name, set of photos and default voice. Picking one changes all three at once; that is why the platform asks for confirmation before applying it.
There are two catalogs:
- Freemium: included in your plan. Every avatar in this category is available to any account.
- Prime: custom avatars with an additional cost, created for a brand. They appear dimmed unless assigned to your account. If you want your own, the Contact us here link opens the customer service channel.
Change the avatar
- In the Avatar tab, browse the gallery. The avatar in use is highlighted.
- Click the one you want.
- Read the notice — By selecting this avatar you will change the avatar's name, voice and appearance — and confirm with Save.
- If your account allows it, a field to rename the avatar appears at the top. Type the name and save.
The name matters
The agent introduces itself with that name in every conversation ("I'm Valentina…"). Pick one that sounds natural to your audience and do not change it often: returning customers remember it.
Profile picture
Each avatar comes with several photos. In this tab you choose which one is used as the profile image on your channels (WhatsApp, web widget, etc.). Click the photo and it is selected instantly; the one in use is marked.
The photos are those of the chosen avatar: you cannot upload your own images here. If you need different photos, the option is a Prime avatar.
Voice
The voice is used when the agent sends voice notes or handles calls. The list is filtered by language and gender; each voice states its accent and style (for example Spanish · Colombia · Bogotá · Soft).
For each voice:
- Listen plays a sample.
- Use selects it. It gets the Selected tag.
- The settings button (only on the selected voice) opens the advanced parameters.
Audio generation parameters
Three controls from 0 to 1, in steps of 0.1, with a text box to try how it sounds before saving:
| Parameter | Low | High |
|---|---|---|
| Stability | More expressive and variable between audios. | More consistent and monotone. |
| Similarity | Freer with respect to the original voice. | More faithful to the original voice. |
| Style exaggeration | Neutral style. | Emphasizes the voice's character; may sound less natural. |
Type a sentence in Voice test text, hit Listen, adjust and listen again until you like it. Save becomes enabled when there are changes.
Start in the middle
Extreme values usually make things worse. A good starting point is stability and similarity around 0.5 and style exaggeration at 0.